
5 min read · Updated 2026-11-12
Importing Locations from Attendee Emails: How it Works and Honor Privacy
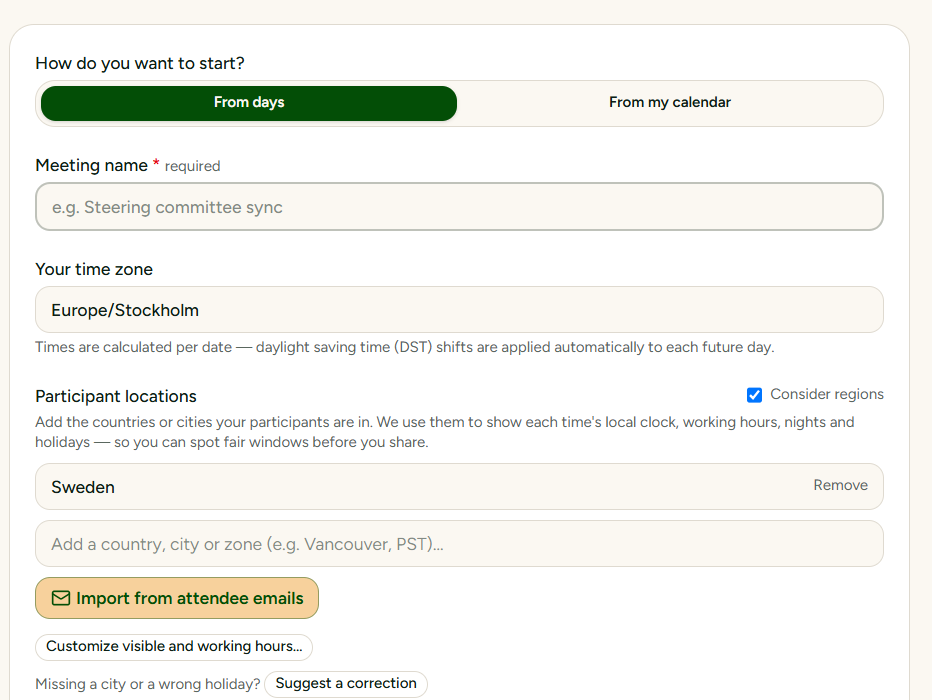
Step 1: Open "Import from attendee emails"
- Go to the meeting creator on the homepage.
- Under the Participant locations section, click the green Import from attendee emails button (located alongside Find locations and Add locations).
- A clean paste area opens immediately below.
Step 2: Paste Your Attendee List (Any Format)
You do not need to reformat, clean up delimiters, or strip out recipient names. Paste whatever you have in your clipboard:
- Outlook recipients: Semicolon-separated strings (
alice@uu.se; bob@ethz.ch; carl@cern.ch) - Display names with angle brackets: Standard mail client exports (
"Dr. Jane Doe" <jdoe@ox.ac.uk>; Smith, John <john@mit.edu>) - Spreadsheets & documents: Plain newline-separated or space-separated lists
- Standard comma lists:
anna@kth.se, david@tum.de
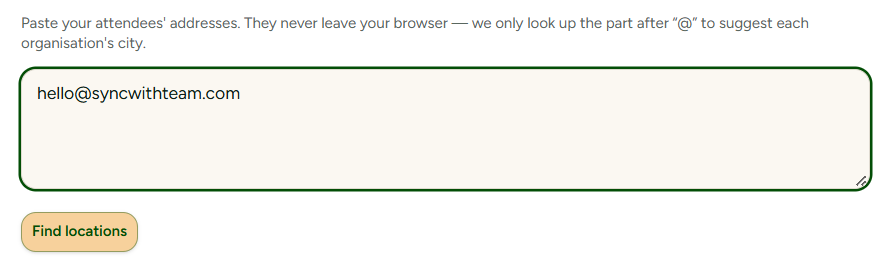
The parser searches through the text for valid email domains and safely ignores punctuation, delimiters, and surrounding text. Click Detect locations.
Step 3: Review and Refine the Proposed Cities
SyncWithTeam processes the list instantly and displays a summary:
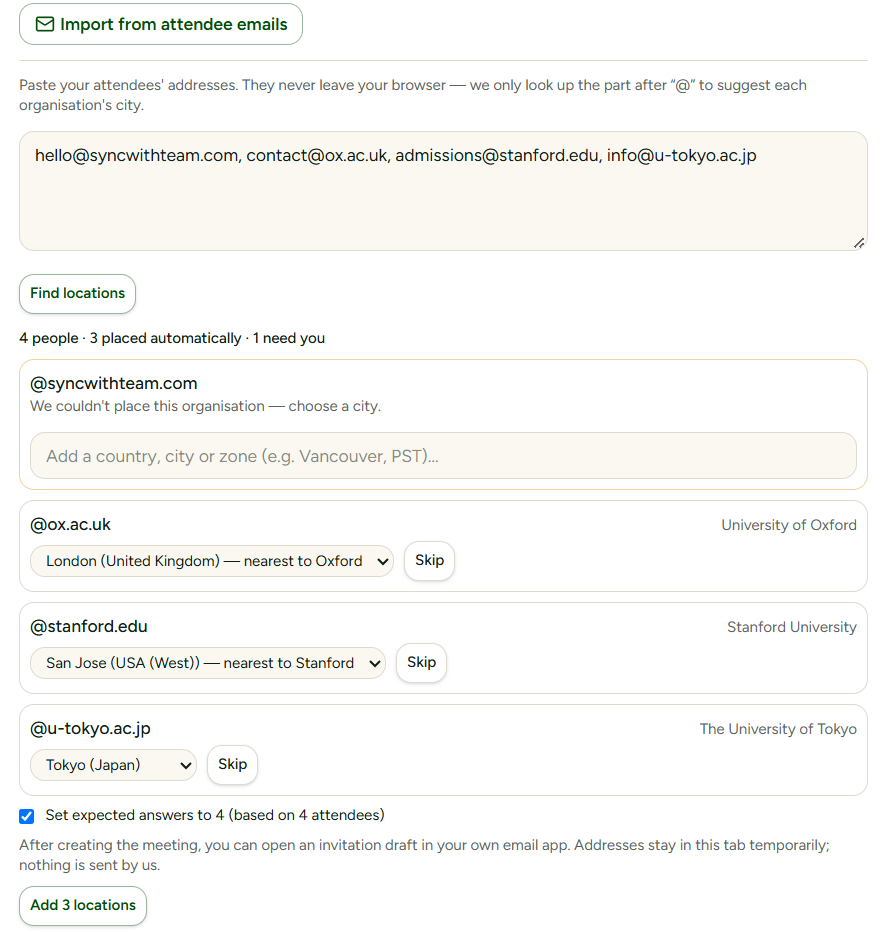
- Recognized Domains: Matched institutions are linked to their canonical primary city (e.g., Oxford for
ox.ac.uk, Zürich forethz.ch, or Stockholm forkth.se). - Headquarters and Estimates: If a company domain points to an international headquarters, a transparent label appears (such as
— based in New York, please check), allowing you to confirm or switch to a regional branch if needed. - Public / Generic Providers: If an attendee uses a generic email provider (such as Gmail, Outlook, or iCloud), SyncWithTeam flags it so you can assign the participant's city manually using our 2,200+ city picker.
Before adding them to your poll, you can:
- Deselect any location you don't wish to include.
- Check the box to "Set expected responses to [N]" so your poll statistics track attendance accurately.
Click Add locations to meeting to populate your participant list.
Step 4: Use the Automatic Invitation Draft
Once your meeting poll is created, SyncWithTeam remembers your imported attendee list in your local browser session for 24 hours:
- On the poll confirmation screen, you will see an Invitation draft panel.
- Click ✉ Open draft in email app to launch your default mail client with all attendee addresses already placed in the
Bcc:orTo:field, accompanied by a clean, polite invitation message and your unique poll link. - Alternatively, click Copy invitation message to paste the formatted text directly into Slack, Teams, or WhatsApp.
- Click ✕ Dismiss whenever you are done; all local draft memory is cleared upon dismissal or when you close your browser.
The Privacy Honored: How Your Data is Handled
Most scheduling apps require you to grant OAuth permissions to read your address book or store participant lists in their database to send automated invites.
SyncWithTeam was built under a strict privacy-first principle:
- Zero Text Before the
@Leaves the Browser: Our client-side parser extracts only the domain portion of each email locally. The username, first name, and last name are discarded immediately. - No Email Storage: The database does not have a table for attendee email addresses. Neither your addresses nor your participants' addresses are stored on our servers.
- No Profiling or Selling: SyncWithTeam is 100% ad-free and tracking-free. We do not build user graphs, sell marketing insights, or contact your attendees.