
4 min read · Updated 2026-11-09
How Guests Respond in Under 20 Seconds (No Account Needed)
One of the biggest obstacles in group scheduling is participant friction. Traditional scheduling tools often force guests to register an account, grant full access to their private Google or Outlook calendar, or download a native application before they can indicate when they are free.
SyncWithTeam eliminates this entire barrier. When you receive a meeting invitation, you can submit your availability in under twenty seconds with zero account setup.
Here is exactly what the response experience looks like, step by step.
Watch it in action: the 20-Second Response Challenge.
Step 1: Open the link — no login needed
Click the invitation link shared by the organizer. You will immediately see the meeting overview in your web browser.
- No password required: You do not need to sign up, verify an email address, or remember a password.
- Works on any device: The invitation opens smoothly on smartphones, tablets, laptops, and desktop computers.
- Privacy first: The tool never asks for access to your personal email inbox, contacts, or calendar entries.
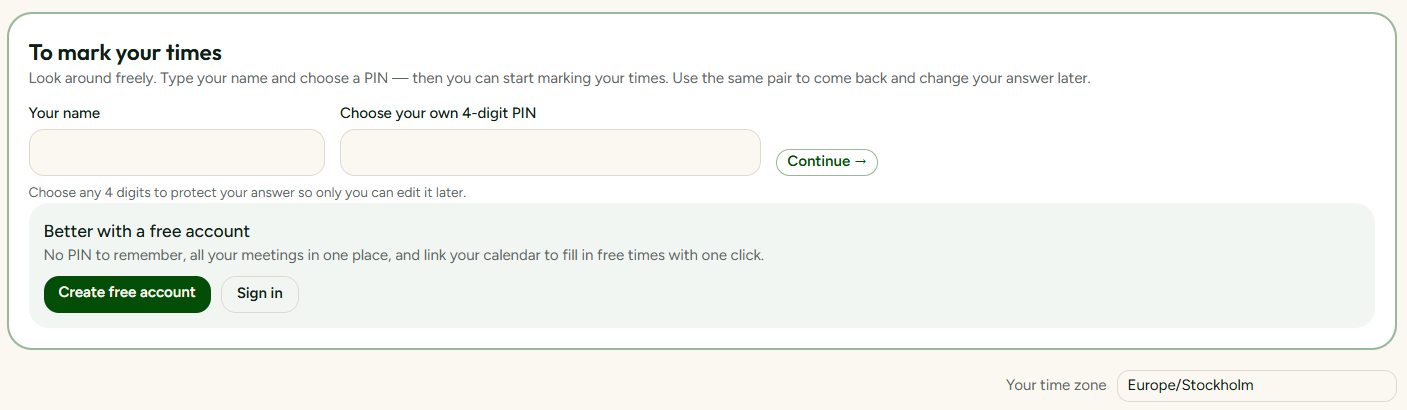
Step 2: Confirm your local city and time zone
SyncWithTeam automatically detects your device's local time zone and converts all proposed slots to your local clock.
If you are currently traveling or planning for a different location:
- Look at the city selector at the top of the meeting page.
- If needed, select or search for your destination city.
- Every slot in the grid instantly updates to reflect local hours in that location.
You never have to calculate time zone math or guess whether the organizer's 14:00 means 08:00 or 20:00 for you.
Step 3: Enter your name (and optional PIN)
Type your name in the participant field so the organizer knows who responded.
- Optional PIN: If the organizer enabled PIN protection, you can set a short four-digit PIN alongside your name. This prevents anyone else with the link from accidentally overwriting your submitted answers later.
Step 4: Click or drag to indicate your availability
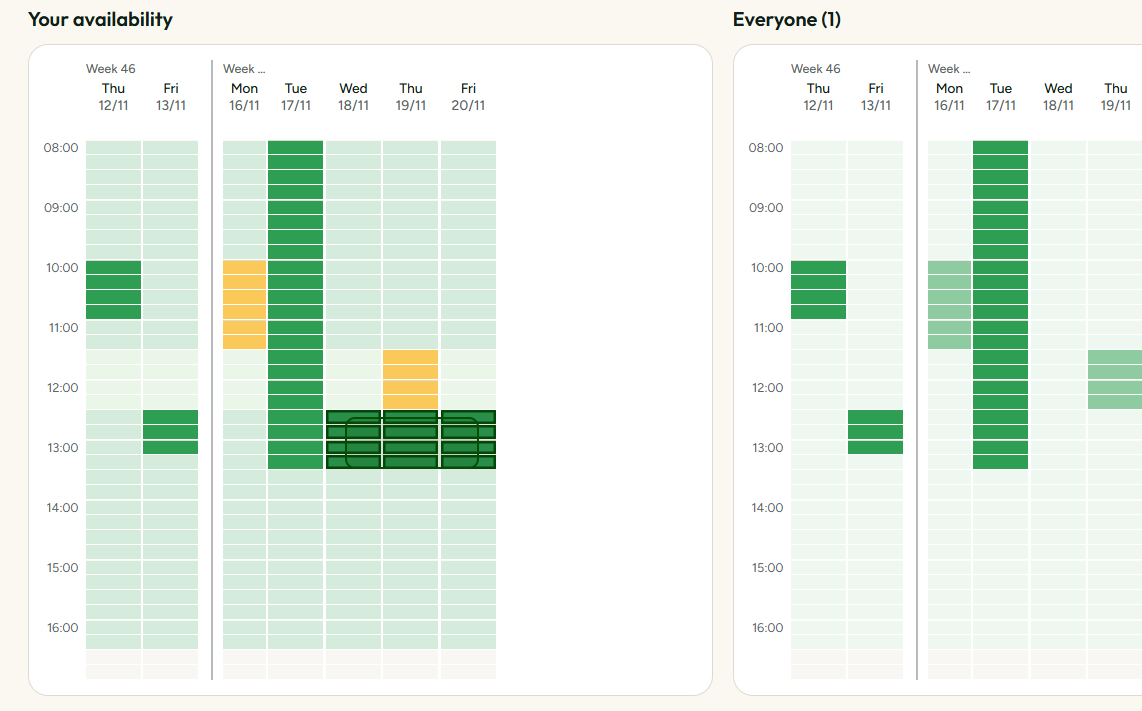
The organizer's proposed meeting slots are displayed in an intuitive grid.
- Click or tap a slot: Mark a time as suitable.
- Drag across slots: On a desktop or touch screen, simply drag across multiple adjacent hours or days to mark them all in one fluid motion.
- Color codes:
- Green / Solid: You are fully available.
- Muted / Clear: You cannot make this time.
Step 5: Automatically saved
Once you have highlighted the times that fit your schedule, your availability is automatically saved without you needing to/forgetting to save your answers.
However, if you change your mind you can either remove a time by just marking it again or withdraw all of your answer by clicking the button.

Can you change your response later?
Yes. If your plans change before the organizer finalizes the meeting:
- Re-open the same invitation link in your browser.
- Select your name.
- Type in the same PIN as when you responded the first time.
- Adjust your selected slots and you are done.
What about guests who want calendar integration?
If you prefer to see your own schedule overlaid directly on the grid, you can connect an optional free SyncWithTeam account at any time.
However, this is always completely optional. You are never required to connect a calendar or create an account just to help a colleague find a time to meet.
💡 Why cities instead of abbreviations? Read Why time zone abbreviations cause costly mistakes.