
5 min read · Updated 2026-11-10
Creating Your First Global Meeting: From Days or From Calendar
This guide walks you through creating a global meeting invitation on SyncWithTeam from start to finish. You do not need an account to create or share a meeting — anyone can start a poll in seconds. Signing in is completely optional and simply adds conveniences like saved team groups and calendar overlays.
Watch it in action: the 40-Second Invitation Challenge.
💡 Prefer to click along? The interactive tour walks you through the real planning page with sample data.
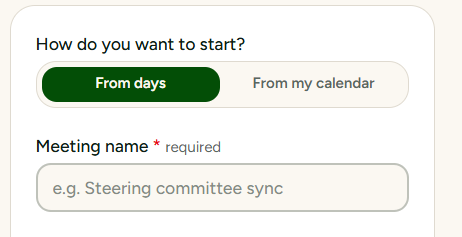
1. Name your meeting
Start by giving your meeting a clear, recognizable name. Your participants will see this title at the top of their response page and in any confirmation emails or calendar invites.
- Keep it recognizable: Include the topic or team name (for example, "Q4 Strategy Review" or "APAC & EMEA Weekly Sync").
- Optional meeting details: You can add notes or a meeting agenda below the title so attendees know what to expect.
2. Choose participants' locations
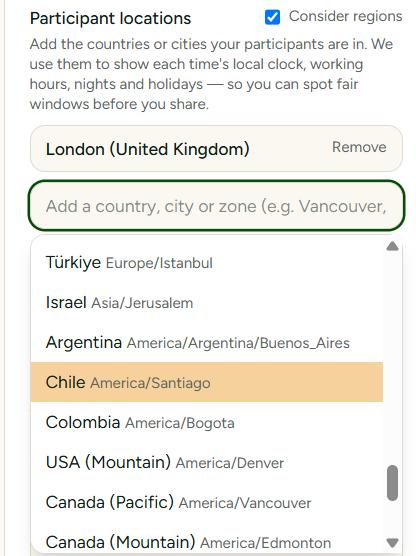
Before selecting any dates or hours, add the countries or cities where your participants are located. SyncWithTeam does this first so it can automatically calculate time differences, weekends, and national public holidays before you offer any meeting slots.
- Search city or country: Type the name of any city or country in the search bar. The search recognizes local spellings, English names, official UN standards, and handles accents and apostrophes automatically.
- Select time zones: If a country spans multiple time zones (such as the US, Canada, or Australia), select the specific regional zone or city.
- Review your locations: Each location appears as a badge showing its current local time and UTC offset.
Why locations come first: By knowing where your participants are right away, SyncWithTeam can highlight conflicts like bank holidays or religious observances on the calendar before you pick dates.
3. Choose dates: From days or From my calendar
Next, pick the dates you want to propose. You can choose between two flexible views depending on your workflow:
- From days: Pick any custom selection of dates. Whether you want an entire week, every Tuesday in November, or three scattered dates across two weeks, click the days you wish to include.
- From my calendar: Browse your schedule week by week. If you have connected your personal calendar, your existing busy times are automatically greyed out so you never double-book yourself.
Weekends and public holidays
To protect everyone's downtime, weekends and public holidays are highlighted and protected:
- Two-click unlock: Days off are locked by default (shaded in grey for weekends, blue for public holidays, or magenta for religious observances/eves). Your first click unlocks the day; your second click selects hours on it.
- Weekend-only meetings: If your entire selection consists of weekends (for clubs, sports teams, or volunteer groups), all days start automatically unlocked.
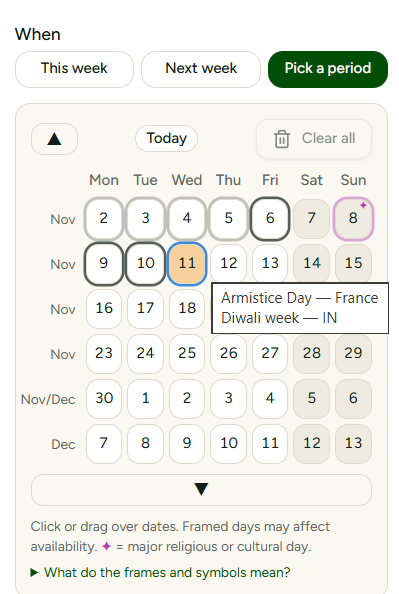
💡 Why this matters: How to avoid public holidays when scheduling globally explains why checking each date's local holidays saves a second round of polling.
4. Mark the times you want to offer
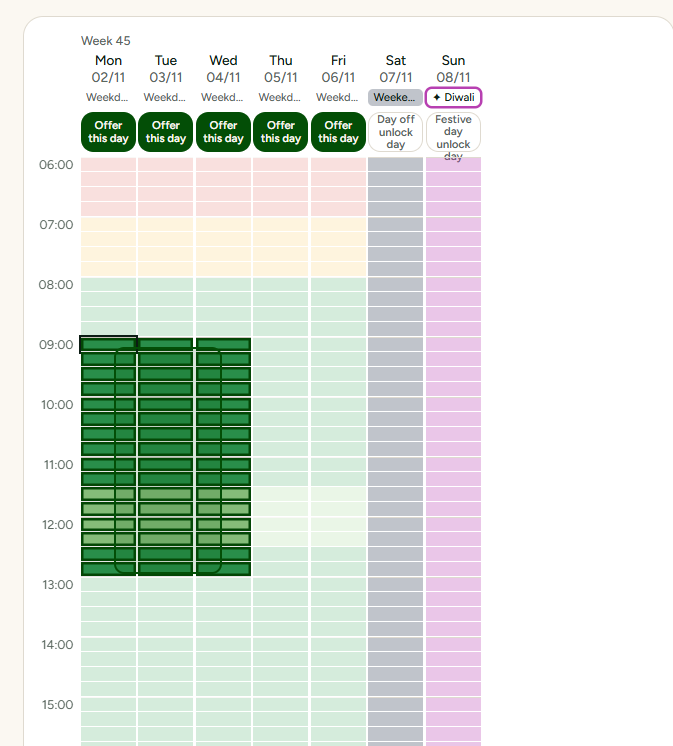
Once your days are set, indicate the hours you want to make available. You never have to click every single hour manually:
- Quick select buttons: Use Offer shared office hours to instantly select the overlapping 9:00–17:00 window across all participant zones, or Offer all awake hours (07:00–22:00) for wider coverage.
- Day-by-day buttons: Click the button directly below any day column (such as "Offer this day" or "Offer my free times") to populate or clear that single date.
- Drag across the grid: Click and drag with your mouse or finger across the grid to highlight custom blocks — even across multiple days in one smooth gesture.
- Clear selection: The Clear selection button is always visible if you ever want to reset your choices and start fresh.
Unselected slots appear softly faded (~20% opacity), while selected hours shine in full color with local times visible for every time zone.
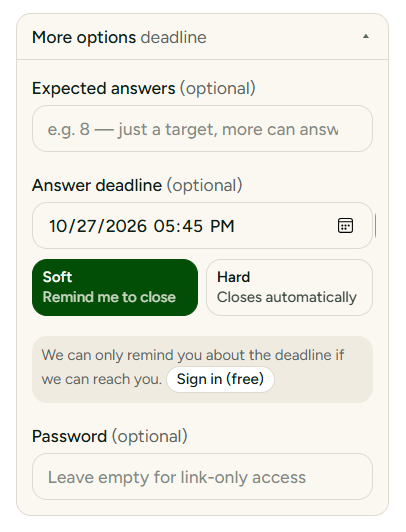
5. Additional options: Deadlines, passwords and settings
Before publishing, you can fine-tune how your meeting runs under Options:
- Response deadline: Set a soft or hard deadline for votes. You can configure it to close automatically once everyone has replied.
- Meeting password / PIN: Protect confidential polls with an optional passcode that guests must enter before viewing or responding.
- Essential participants: You will also be able to mark key participants once votes start coming in, ensuring the final booking includes the people you cannot meet without.
💡 Related guide: How guests respond in under 20 seconds shows exactly what your invitees see.
6. Share the invitation
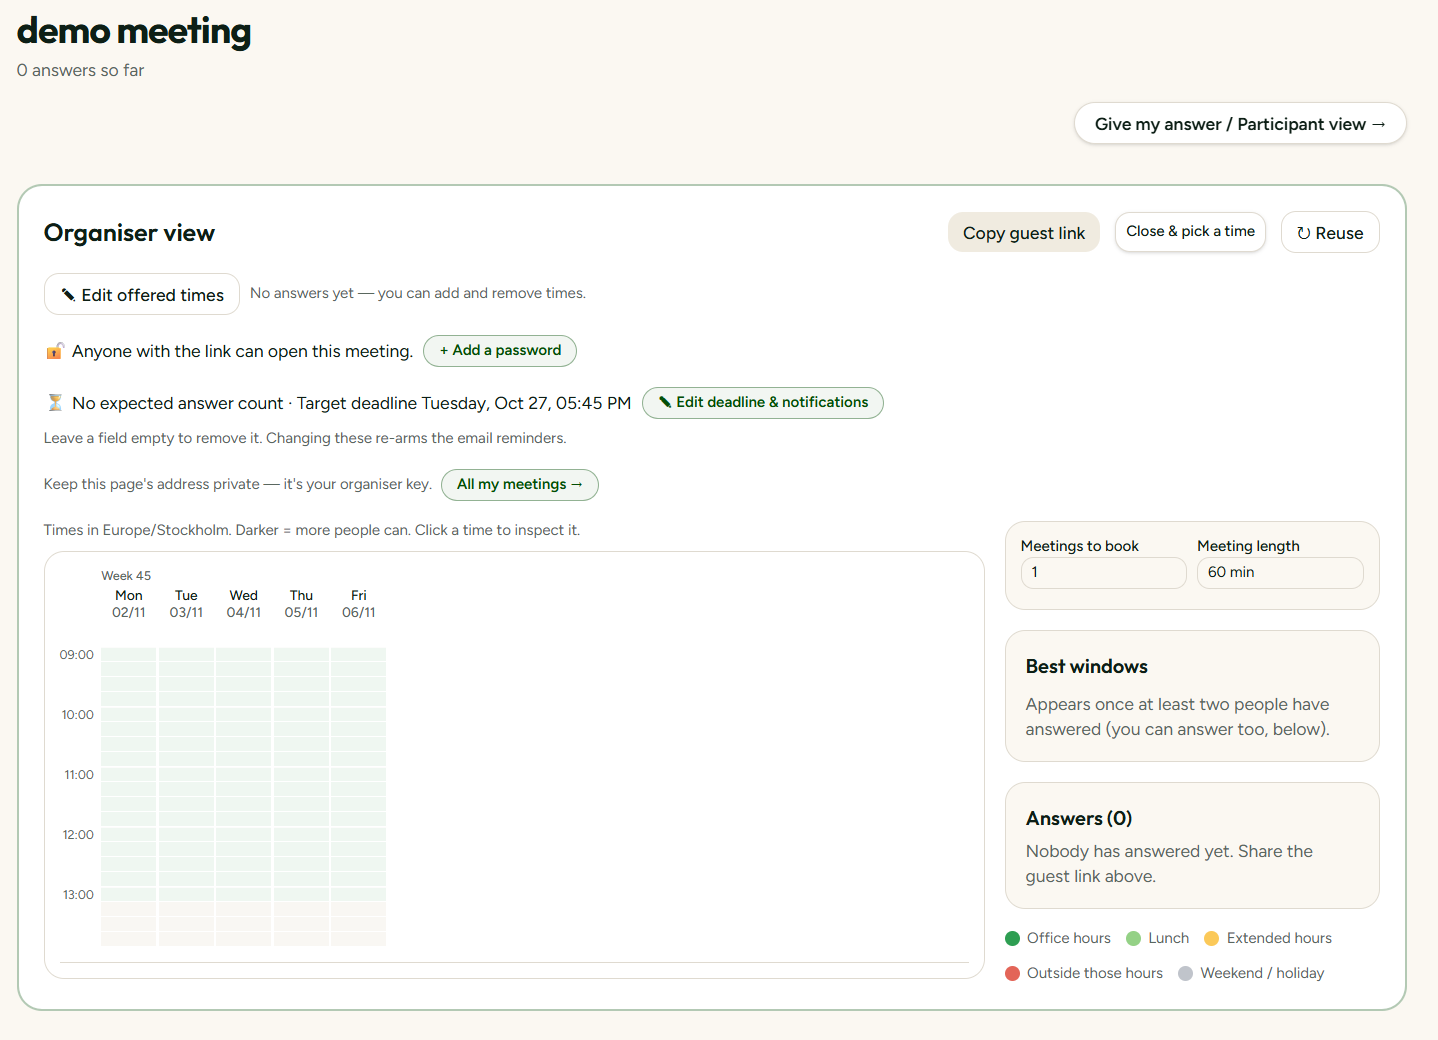
Click Create meeting to generate your meeting links. You will receive two distinct URLs:
- Guest link (Share this): Send this link to your participants via Slack, Teams, email, or WhatsApp. Guests can view the grid in their own local time zone and submit their availability in under 20 seconds — no registration or account required.
- Organiser link (Keep private): Bookmark this administrative link. It gives you full control to monitor responses, change dates, and book the final time.
(If you are signed in to a free SyncWithTeam account, this meeting is automatically saved to your My meetings dashboard, so you never have to worry about losing your organizer link.)
Beyond the basics
What you have read here is the simplest path, so you can get started fast. When you need more, these are waiting:
- Booking a series — several meetings or a recurring sync from one poll.
- Partial booking — book the first meeting now and keep collecting answers for the rest.
- Finding the best time — star must-attend people or ignore a duplicate answer.
- Deadlines & reminders — soft or hard cut-offs and notifications on your terms.
- Reusable groups — save your places and share one standing link.